
What you will need (for MY version):
*Two different cake mixes
*Two 8-inch round cake pans
*Four cupcakes
*Frosting
*Food coloring
*Decorator's frosting in a tube
*Graham cracker crumbs
*Patience
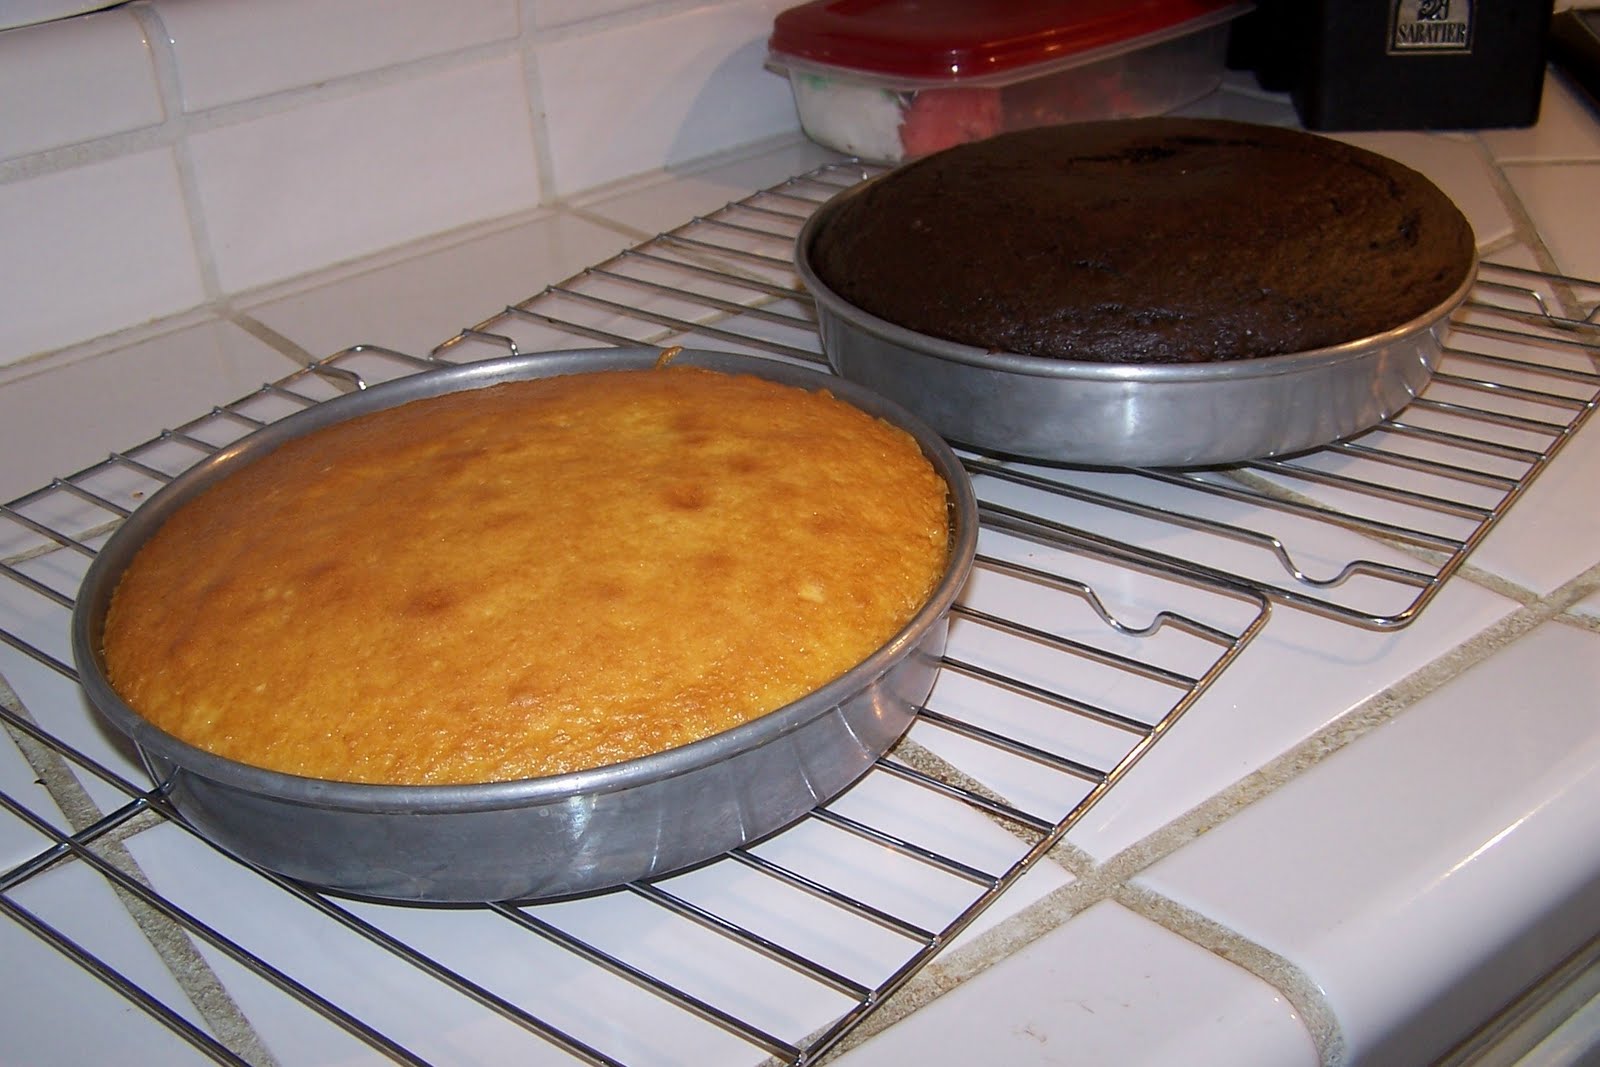
Step 1. Prepare cakes according to package directions. (I used 1 dark chocolate and 1 classic yellow mix, but this is completely optional, as you can make this same cake with just one mix, but I chose to be complicated by having more than one flavor cake). Pour half of each mix into lightly greased cake pans. (I used the rest of the cake batter to make cupcakes to freeze for another time). Bake according to package directions.
 |
| Yin and Yang |
Step 2. Allow cakes to cool completely. (There may be a SLIGHT chance that I put more chocolate batter in the pan than yellow. But no biggie; everyone knows chocolate is better anyway.)
Step 3. Cut each cake in half. Use frosting (I used a can of classic white frosting) to join the two cakes together, round sides facing out. Frost the flat side before placing on a tray to ensure the cakes stay firmly in place. Seal both cakes together with frosting, (See photo in Step 4) to even out any inconsistencies in cake size. (This is especially important if your chocolate cake turned out twice the size of your yellow cake). This will also help to seal in any lose crumbs before applying the final layer of frosting.
 |
| "Two players, two sides-one is light, one is dark." |
Step 4. Using the other half of one cake (I used the chocolate half), cut out a shape for the tail. (I used the guidelines from this template for the tail). Cut and trim the tail accordingly and secure on tray with frosting. Apply a crumb coat of frosting to the tail.

Step 5.. Cut out a shape for the neck (I used a very modified version of the neck in the same template as the tail). Cut and trim accordingly. Secure to the tray using a layer of frosting. (This does get a little repetitive, folks).
Step 6. Join two cupcakes (I used leftover strawberry cupcakes from Ben's first birthday party) together with frosting and secure to the tray and neck. This will be the head. (I cut a flat bottom into each cupcake, then used the cut-off pieces to help smooth out the uneven seam at the top of the cupcakes).
 |
| Say what you will, it IS a dinosaur. |
Step 7. Use this guide to cut out pieces from the last half of unused cake to create hind legs and front legs. (You should have had a total of four halves, two being used for the body, and one for the neck and tail. However, if you like to make things difficult for yourself, as I do, by using two different flavored cakes, then you may have already cut into all four halves. In this case, do what I did and use some of those cupcakes you baked with the leftover batter. Shape them to resemble legs and feet. This is also a smart option if you found the diagram above as confusing to understand as I did). Don't forget to attach those legs to the tray and body using some frosting! (If you are now completely confused as to what your legs and feet should look like, just skip them altogether and draw those suckers on like this person did, although I do not recommend doing this).
 |
| Joseph's Technicolor Dreamcake |
Step 8. Pop your cake into the refrigerator to allow your crumb coat to set. Go watch some television, check your email, update your Facebook status or read a book while you wait. If you are a glutton for punishment and choose to make a homemade vanilla buttercream frosting to decorate your cake with, now would also be a good opportunity to whip up a batch. (Or two, because the first batch didn't seem to be near enough frosting to cover your entire dinosaur, even though it really was and you now have an ample amount of green buttercream frosting hanging out in your fridge). Don't forget to color your frosting. (If you are looking for the "right" color green, you may want to use a whole tube of green gel color, but you probably still won't get the darker green that you were hoping for).
Step 9. Using your double batch of homemade light green vanilla buttercream frosting, give that dinosaur some skin. (See? It really IS a dinosaur!)
 |
| Frost Yourself |
Step 10. Take a break. Go get something to eat. Watch half an episode of Say Yes to the Dress. Clean up the kitchen. Hop on the computer to scroll through these photos to find an acceptable dinosaur face to copy. Give up on finding an acceptable dinosaur face to copy and decide to wing it.
Step 11. Use tubes of decorator's frosting (quite possibly NOT the technical term, nor the phrase used on the packaging) to apply a face, claws, and spikes, (all of which will leave you wondering until the next morning whether you like them or not). Go upstairs to console a screaming child. 15 minutes later, leave child to cry himself to sleep and go clean up the kitchen. Wash your face, brush your teeth and go to bed.
 |
| Four hours later.... |
Step 12. Smear (I just discovered that I don't like the sound of that word) the top of the tray with cooking spray. Sprinkle with graham cracker crumbs. Step back and admire.
 |
| Duff WHO? |
Step 13. Write your birthday message in uneven print. Step back and admire less.
 |
| The Cake Boss has nothing on me! |
Step 14. Insert a candle and present to your one-year-old, hoping that he does not decide to find out what fire feels like.
 S S |
| Can't. Stop. Looking. So. Mesmerizing... |
Step 15. Serve your one-year-old the dinosaur's face and leave your family members wondering why you would do something so creepy as serving a severed head on a plate to your adorable child.
 |
| He's looking at me... |
Final Note to Self: Pay someone else to make the cake next year.
I'm very, very impressed.
ReplyDeleteThank you. I was very proud of myself too. And too clarify, I didn't spend the WHOLE four hours on the cake. There were other things going on as well.
ReplyDeleteWow! This is really cool. It came out so well. I love the extra step of the graham crackers for the sandy ground. (And also that you made fun of the picture were you first add the cupcakes for the *ahem head.) hee hee!
ReplyDelete@Jules: Thank you! And I'm glad that it wasn't just me who was thinking something looked a little "wrong" when I added the head! LOL.
ReplyDeleteI loved this. It was so cute and funny. My nephew wants a cake for his birthday, I am going to make him this one :)
ReplyDeleteAwesome! Thanks for sharing. I will try this for my sons 1st birthday party.
ReplyDeleteWhat frosting recipe did you use? It looks really smooth.
ReplyDeleteMy apologies for such a delayed response to your question! I don't keep up with this blog any more; life has become too hectic. To answer your question, I made this cake so long ago, that I honestly don't remember where my recipe came from. But I can tell you the trick that I used to get it to look so smooth. I simply dampened my fingertip with a bit of water to smooth everything out.
DeleteOh oh oh!!! Thank you so much ... I have been searching the internet all day for the perfect dinosaur cake and there you were all the time! Apart from the brilliant instructions and super looking cake I actually had tears rolling down my face as I read. I shall be doing ALL of the above funny bits! Bet it takes me more than 4 hours though. And call me wicked, but I want this cake for me sister's 50th birthday (The dino will be holding a flag saying Happy Birthday you old dinosaur!) Don't worry, she can get her own back on me for my 50th next year! Thank you again - best smiles I had for ages :)
ReplyDeleteI am glad to hear that you enjoyed this post! And that you found me and my dinosaur cake! I love that you are doing this for your sister, but I'm not sure that she will love it as much! :-) I hope it turned out well for you!
Delete